TL;DR
- Configure automatic friend request acceptance in privacy settings before purchasing items
- PS4 users must set friend requests to ‘Anyone’ in privacy settings
- Xbox players need ‘Adult default’ privacy with multiplayer permissions enabled
- Use Epic Games account name, not platform gamertag, for display name verification
- Complete account setup takes 5-10 minutes but prevents transaction delays
When preparing to acquire Fortnite items through third-party marketplaces, you’ll need to provide specific account credentials beyond just payment information. Your Fortnite display name and Epic games email address serve as primary verification methods, but the most frequently overlooked requirement involves configuring your account to automatically accept friend requests. This setting enables sellers to deliver purchased items directly to your account through the friend system.
Many players encounter transaction failures because their privacy settings block incoming friend requests. Without this configuration, sellers cannot complete the delivery process, leading to frustrating delays and potential cancellation of your order. Proper setup ensures seamless item transfers and protects your gaming experience.
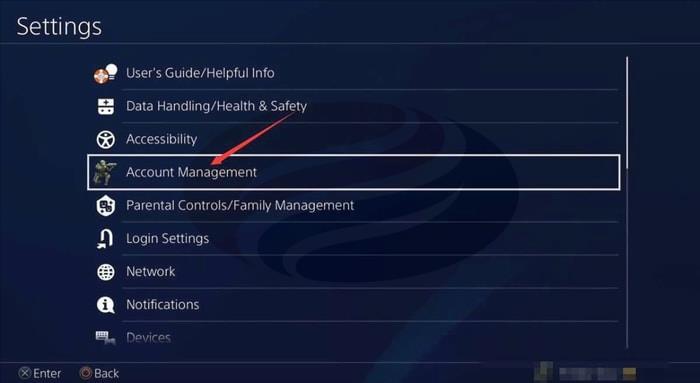
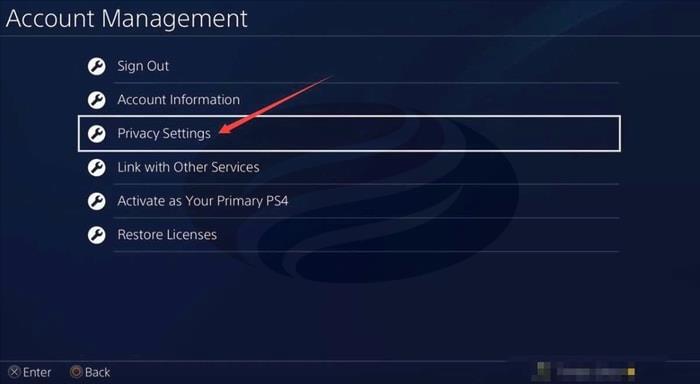
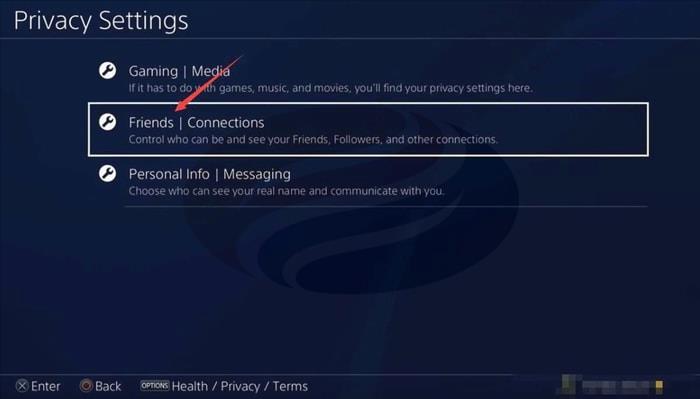
PlayStation 4 users must navigate through specific menu paths to enable automatic friend acceptance. Begin by accessing your PS4 settings menu, then proceed to account management options. Within this section, locate privacy settings where you’ll find friends and connections controls. The critical step involves selecting the friend requests submenu and choosing the “Anyone” option to permit unrestricted incoming requests.
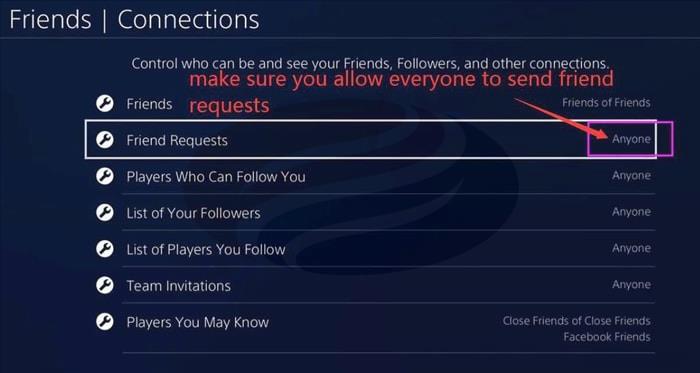
Common mistakes include selecting “Friends of Friends” instead of “Anyone,” which still blocks marketplace transactions. The entire configuration process typically takes 3-5 minutes but saves hours of potential troubleshooting later.
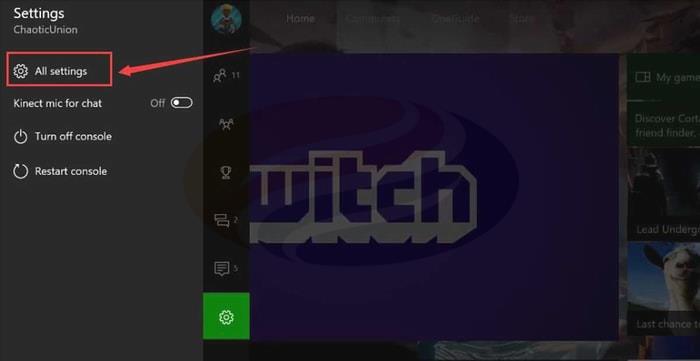
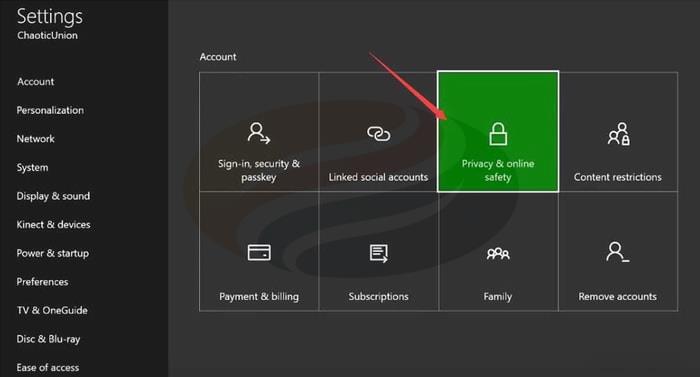
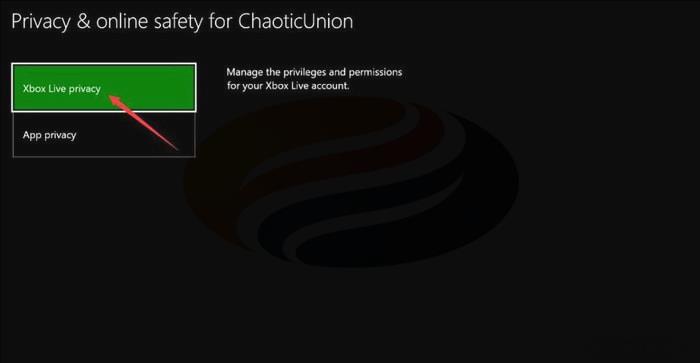
Microsoft’s Xbox One platform employs a different privacy architecture that requires specific permission adjustments. Start by accessing your XBOX settings panel, then navigate through all settings options until you reach privacy & online safety controls. Within XBOX Live privacy settings, select the “Adult default” account type for appropriate permission levels.
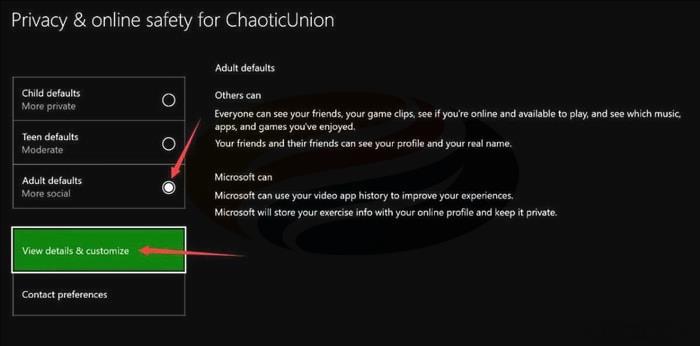
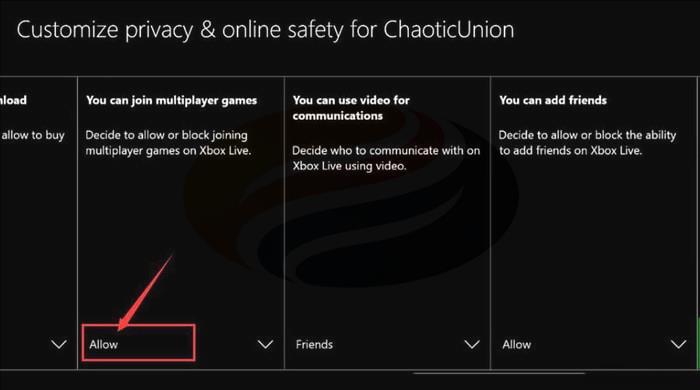
After choosing the appropriate account type, proceed to “View details & customize” where you’ll locate multiplayer game permissions. Under “You can join multiplayer games,” ensure the setting is configured to “Allow” rather than “Block” or “Friends only.” This specific permission enables the friend request automation necessary for item delivery.
Xbox configuration typically requires 4-6 minutes due to the layered menu structure. Advanced players recommend completing this setup before browsing marketplace listings to prevent purchase interruptions.
Where to find my Fortnite display name and epic games email address?
1. Navigate to www.epicgames.com using your preferred web browser. Ensure you’re accessing the official Epic Games website to prevent phishing attempts.
2. Locate and click the Sign-in button positioned in the top right corner of the page. Authenticate using your Epic Games account credentials to access your profile dashboard.
3. Hover your cursor over your display name in the navigation bar, then select the “Account” option from the dropdown menu. This action directs you to the account management interface where your Fortnite display name and Epic games email address are displayed prominently. Critical reminder for PlayStation 4 and Xbox ONE users: Your Epic display name must be your Epic Games account identifier, not your Xbox Live gamertag or PlayStation Network ID.
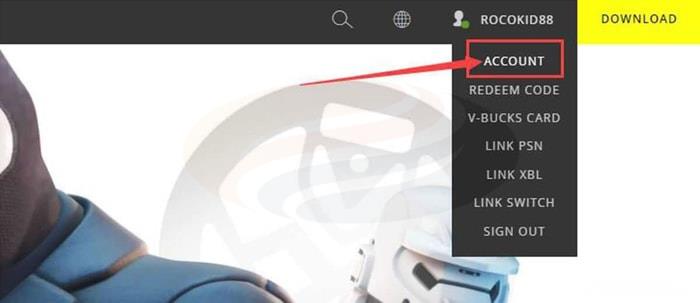
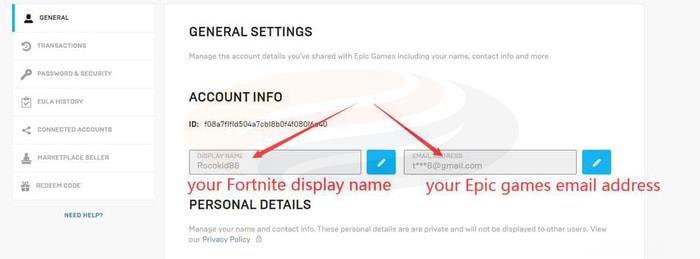
This distinction is crucial because cross-platform functionality relies on your Epic Games identity rather than console-specific profiles. Verification failures often occur when players provide their platform usernames instead of their unified Epic account name.
Beyond basic configuration, experienced Fortnite players implement additional security measures to protect their accounts during marketplace transactions. Enable two-factor authentication on your Epic Games account before providing any personal information to third-party sellers.
Consider creating a dedicated “marketplace friend list” to separate transaction contacts from your regular gaming companions. This organizational strategy maintains your social gaming experience while facilitating secure item exchanges.
For optimal purchase timing, complete your account setup during off-peak hours when Epic Games servers experience less traffic. This approach minimizes potential authentication delays that can complicate the item delivery process.
After receiving your purchased items, remember to review and adjust your privacy settings if desired. Many players prefer restoring stricter friend request controls after transactions complete to maintain their preferred social boundaries.
Action Checklist
- Configure automatic friend request acceptance in your platform’s privacy settings
- Verify your Epic Games display name and email address through the account dashboard
- Enable two-factor authentication for enhanced account security
- Test friend request functionality by having a friend send you a request
- Complete purchases during low-traffic server periods
No reproduction without permission:OnLineGames Guides » Fortnite: How to Make Your Account Automatically Accept Friend Requests Complete guide to configure Fortnite account settings for secure item purchases and friend request automation