TL;DR
- Destroy Valtan’s armor layers early using coordinated destruction bombs and weak point skills
- Master the 130 HP bar mechanic with Balthorr immunity or blue orb strategies
- Perfect your red zone dodging and pillar positioning for critical survival moments
- Coordinate counter attempts at 65 HP bars to prevent team wipes
- Execute ghost phase mechanics by countering spectral entities to remove damage reduction buffs
Valtan represents Lost Ark’s premier tier 3 Legion raid, featuring two distinct phases that reward players with valuable tier 3 Accessories, Ability Stones, and enhancement materials. Following the May update, this challenging encounter demands precise coordination and strategic preparation. After successfully clearing phase 2, teams can invest in-game gold to unlock additional premium rewards, making mastery of these mechanics essential for progression-focused players.
Required Item Level
Normal Difficulty: 1415
Hard Difficulty: 1445
Battle Items to Prepare
DPS Loadout:
Health Potions for emergency recovery
Destruction Bombs for armor penetration
Flame Grenades for additional damage pressure
Timestop Potions for mechanic evasion
Support Loadout:
Health Potions for teammate assistance
Corrosive Bombs to amplify team damage
Destruction Bombs for backup armor breaking
Dark Grenades for debuff application
Timestop Potions for critical saves
Pro Tip: Coordinate item usage with your team to maximize efficiency. Supports should communicate when they’re applying Corrosive Bombs to ensure DPS players time their destruction skills appropriately.
Stages You Go Through at Valtan Phase 2
160 Health Bars: Engagement Initiation
130 Health Bars: Balthorr Activation Phase
110 Health Bars: Red Zone Evasion Challenge
85 Health Bars: Arena Fragmentation Sequence
65 Health Bars: Counter Mechanic Critical Point
35 Health Bars: Secondary Destruction Phase
Ghost Phase: Spectral Transformation
Important Note: Health bar thresholds may fluctuate slightly based on your team’s damage output consistency and burst timing.
160 Health Bars: Engagement Strategy
Valtan materializes at the arena’s center, initiating combat with a circular movement pattern followed by a targeted dash toward a randomly selected player.
To successfully stagger the commander, position your team at the nine o’clock marker directly facing a structural pillar. This strategic placement encourages Valtan to collide with the obstacle during his dash sequence. Following impact, he enters a vulnerable state where coordinated teams should systematically dismantle his initial armor layer utilizing Destruction grenades complemented by Weak Point abilities.
During this encounter phase, Valtan maintains dual protective layers that substantially mitigate incoming damage. Your primary objective involves completely eliminating these defensive barriers.
Support specialists should deploy Corrosive bombs immediately preceding Valtan’s dash animation to accelerate the armor degradation process significantly.
Following two successful dash sequences, Valtan ascends skyward, generating distinctive green area-of-effect markers beneath each combatant. Evade these hazards by maintaining circular movement patterns while ensuring minimal player overlap. This represents an optimal moment to activate protective shielding abilities if available.
Subsequently, an expansive area-of-effect initiates charging from the central point, impacting nearly the entire battlefield with the exception of secure zones along the perimeter near damaged wall sections.
Successfully eliminating Valtan’s complete armor configuration provides substantial advantages for subsequent encounter stages, marking significant progression toward raid completion.
130 Health Bars: Survival Mechanics
At approximately 130 health increments, Valtan prepares a devastating two-stage assault capable of eliminating unprepared teams entirely.
The most straightforward survival method involves activating the Sidereal Skill – Balthorr, granting complete damage immunity throughout the attack sequence.
Alternative protection exists through the structural pillars distributed around the combat arena, which contain protective blue orbs providing immunity against Valtan’s massive area assault. This alternative strategy proves valuable when conserving Sidereal abilities for later encounter phases.
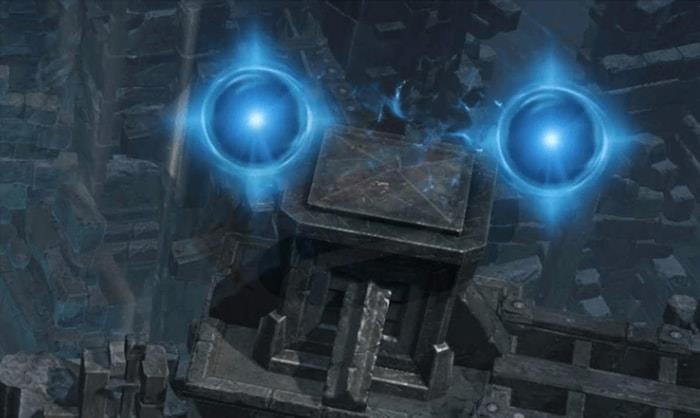
Destroying these structural elements releases the protective spheres onto the battlefield. Ensure every team member collects an orb to guarantee collective survival through Valtan’s catastrophic area attack.
This strategic approach particularly benefits high-damage compositions seeking to maintain aggressive pacing without defensive cooldown conservation.
110 Health Bars: Red Zone Mastery
Valtan launches skyward before descending with a targeted red area marker on a randomly selected player. Simultaneously, four additional pillars emerge from the arena surface.
Non-targeted players should immediately position themselves behind protective pillars to avoid catastrophic damage upon Valtan’s landing impact.
If designated with the red targeting indicator, execute evasion maneuvers during the final moment before ability snapshot completion. Optimal dodging strategy involves maintaining proximity to the central area for enhanced maneuverability.
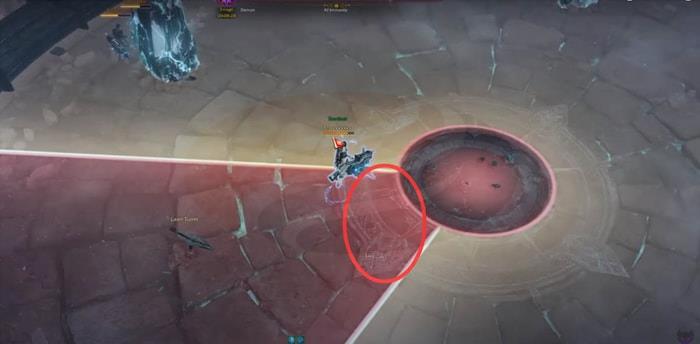
After successfully evading the danger zone, immediately seek cover behind protective structures. If movement speed proves insufficient, activate timestop potions as emergency countermeasures.
Valtan subsequently repeats this mechanical sequence, frequently retargeting previously marked players while causing simultaneous pillar detonation.
85 Health Bars: Environmental Destruction
He ascends once more, transforming half the combat arena into hazardous territory. Position your team centrally during this transition to maintain optimal access to both potential safe zones.

Following survival of the environmental destruction, four additional pillars manifest around Valtan, signaling another red zone targeting sequence. This mechanical repetition requires targeted players to execute precise dodging maneuvers.
During this iteration, structural pillars are guaranteed destruction upon impact, necessitating immediate relocation to designated safe areas.
65 Health Bars: Counter Mechanic Execution
Valtan performs an aerial leap before descending to summon green area effects. Optimal strategy involves team stacking followed by coordinated evasion after marker appearance.
He rapidly illuminates with blue energy, presenting a critical counter-attack window. Every party member should actively attempt counters during this phase. Failed counter execution triggers a grabbing mechanism targeting all players within frontal proximity, repeating until no combatants remain mobile. Continued counter attempts remain possible following initial failure, but complete team capture results in immediate raid failure.
35 Health Bars: Secondary Destruction
Valtan replicates previous environmental destruction mechanics, eliminating the remaining arena sections while repeating red zone targeting sequences.
17 Health Bars: Ghost Phase Transition
The spectral transformation sequence commences as Valtan generates a portal and traverses through it. Exercise caution regarding potential knockback effects if positioned within his traversal path.
He subsequently descends once more, striking each quadrant of the arena sequentially. Simple evasion suffices for this mechanical component.
Reactivate Balthorr to acquire protective buffs that significantly simplify this encounter phase.
He initiates ground impact sequences while summoning area effects beneath each player. Teams may either absorb moderate damage through tanking strategies or execute coordinated clockwise rotations from initial positions for collective evasion.
Following this sequence, Valtan summons three additional pillars that subsequently detonate, eliminating them as potential safe zones.
Without Balthorr activation, players must first position behind protective structures before transitioning to secure locations. However, with the protective buff active, immediate relocation to safe zones becomes permissible.
Ghost Phase: Spectral Confrontation
Valtan undergoes ethereal transformation, replenishing his health reservoir from 15 to 40 increments.
Damage reduction buffs appear beneath his health indicator, with normal mode featuring 4 stacks and hard mode containing 6. Eliminating these defensive enhancements requires successfully countering spectral entities spawning along the arena perimeter. Each effective counter removes one damage mitigation stack.
Grab Mechanic: a crimson area marker manifests before Valtan, capturing any players positioned within its boundaries. This mechanism activates approximately every 10 health bar decrements..
Advanced Positioning Tip: During red zone mechanics, maintain awareness of multiple pillar options. If your initial safe zone becomes compromised during subsequent attacks, having secondary options identified prevents unnecessary casualties.
Common Mistakes to Avoid:
• Premature destruction bomb usage before proper vulnerability windows
• Overlapping during green AoE patterns causing unnecessary damage
• Failing to communicate Sidereal skill activation timing
• Inadequate blue orb distribution during 130 HP bar mechanic
• Poor pillar positioning leading to failed staggers
• Delayed red zone evasion resulting in avoidable casualties
Optimization Strategies:
Coordinate destruction skills with Corrosive bomb applications for maximum armor penetration efficiency. Designate specific players for counter responsibilities during the 65 HP bar phase to ensure consistent mechanical execution. For teams struggling with damage output, consider prioritizing armor destruction over raw damage during early phases to reduce incoming damage significantly.
Time Management: Most experienced teams complete Valtan Phase 2 within 15-25 minutes depending on coordination and gear levels. The ghost phase typically requires 5-8 minutes for successful completion.
Mastering these mechanics not only ensures successful clears but significantly improves your team’s efficiency for future attempts. For comprehensive guidance on other game aspects, consult our Complete Guide to enhance your overall gameplay proficiency.
Action Checklist
- Verify all team members meet minimum item level requirements (1415 Normal, 1445 Hard)
- Coordinate battle item distribution ensuring supports have Corrosive Bombs and DPS carry Destruction Bombs
- Execute pillar positioning strategy at 160 HP bars for successful staggers
- Coordinate Balthorr activation or blue orb collection at 130 HP bars
- Execute precise red zone dodging and pillar positioning at 110 HP bars
- Designate primary counters for 65 HP bar mechanic
- Coordinate team stacking and evasion during green AoE patterns
No reproduction without permission:OnLineGames Guides » How to Clear Valtan Phase 2 – Lost Ark Legion Raid Guide Master Valtan Phase 2 with expert strategies, common pitfalls, and optimized battle tactics