TL;DR
- World bosses offer elite equipment and materials through structured open-world events
- Each boss features unique mechanics requiring specific strategies and coordination
- Proper timing and preparation significantly increase success rates and rewards
- Advanced tactics include phase management and specialized crowd control
- Regular event schedules and community coordination maximize farming efficiency
World bosses represent massive-scale encounters scattered throughout the expansive world of Tyria that require coordinated player efforts to overcome. These epic battles in guild wars 2 consistently draw large crowds of adventurers seeking both challenge and valuable rewards. Participating in world boss events provides one of the most efficient methods for acquiring high-tier gear, rare crafting components, and substantial experience gains. As one of the premier gw2 items and gw2 gold marketplaces, MmoGah presents this comprehensive examination of the world bosses in guild wars 2.
World boss encounters follow predictable spawn patterns with most events occurring on fixed timers, allowing players to efficiently plan their participation. Success typically demands understanding of specific mechanics, proper positioning, and coordinated crowd control. Many events feature multiple phases with escalating difficulty, requiring adaptability and communication among participants. The reward structure includes daily chests containing exotic equipment, rare materials, and currency that can be exchanged for additional valuable items.
New players should note that world bosses scale with the number of participants, ensuring appropriate challenge regardless of crowd size. However, insufficient coordination or lack of mechanical knowledge can still lead to failure, particularly on more complex encounters. We recommend studying boss mechanics beforehand and joining organized squads through the Looking For Group tool for optimal results.
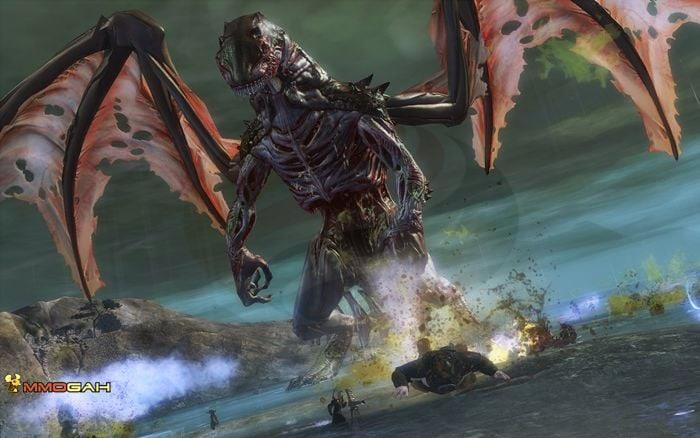
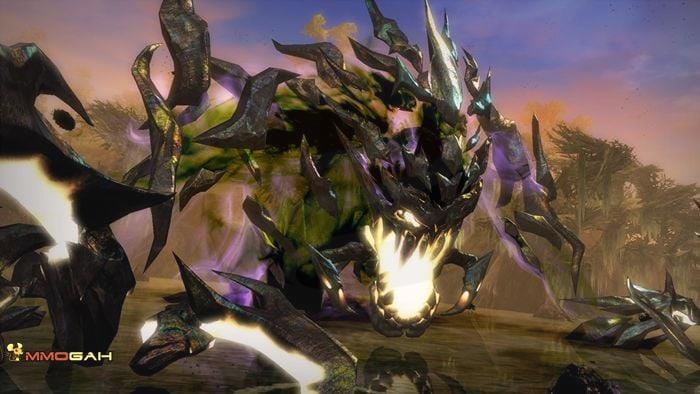
Tequatl the Sunless stands as one of Zhaitan’s most formidable champions, commanding dark energies from the Splintered Coast in Sparkfly Fen. The name Tequatl translates to “the one in darkness” in hylek language, reflecting its malevolent nature. This dragon has maintained a persistent threat against multiple factions including the Vigil, sylvari of Caer Brier, asura researchers, quaggan communities, and indigenous hylek tribes. Recent intelligence from Vigil strategists indicates Tequatl has undergone significant evolution, developing more sophisticated attack patterns and enhanced combat capabilities that demand advanced coordination.
Key strategies for Tequatl include maintaining turret control during the defense phases and coordinating crowd management during the bone wall assaults. Players should prioritize destroying the fingers that spawn around the battlefield to prevent overwhelming adds. The final burn phase requires concentrated damage while avoiding the deadly shockwaves that radiate from the dragon’s position.
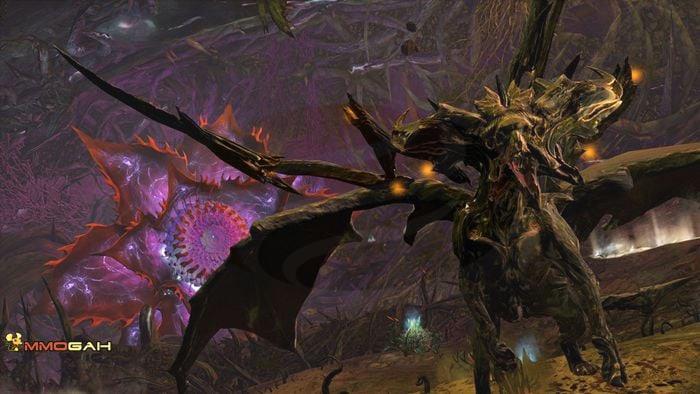
Mordrem Vinewrath constitutes a level 80 meta event chain within the Silverwastes that activates following The Breach completion. Pact aerial transports deliver specialized siege equipment to the combat zone that must be safeguarded as they dismantle the obstructive vegetation sealing off Vinewrath Tangle. Successful breach operations culminate in confronting the Vinewrath itself, requiring precise lane coordination and objective prioritization.
This multi-lane encounter demands balanced team distribution across three separate paths, each featuring unique challenges and mechanics. Failure on any single lane typically results in overall event collapse, making communication and lane balancing critical success factors. Advanced groups often assign specialized roles including lane commanders, healers, and mechanical specialists for optimal performance.
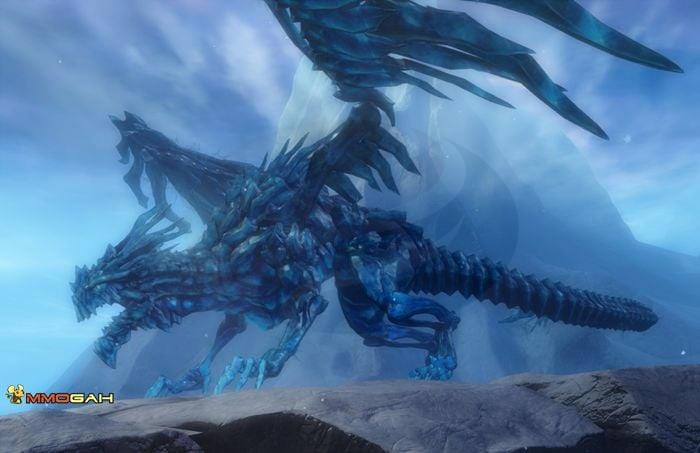
The Claws of Jormag serve as elite lieutenants to the Elder Dragon Jormag, having pursued kodan Sanctuary vessels southward into Frostgorge Sound. These aerial world bosses continuously harass both kodan settlements and Pact installations by launching corrupted ice shards that spawn icebrood minions upon impact. Distinguished from other dragon champions, the Claws of Jormag engagements unfold across distinct combat phases with escalating mechanics.
The encounter progresses through ground defense, aerial assault, and final stand phases, each requiring specific tactical responses. Players must coordinate cannon usage during the flight phases while managing adds and avoiding area denial attacks. The final phase demands precise positioning to avoid the devastating ice breath attacks while maintaining damage pressure.
Jormag, the Elder Ice Dragon, inhabits the northern territories of the Shiverpeak Mountains. This primordial force awakened beyond the Far Shiverpeaks in 1165 AE before advancing southward, compelling kodan populations to abandon their frozen seas and engaging norn defenders in sustained conflict. Jormag’s emergence triggered catastrophic seismic events that fractured the northern landscapes, permitting the frigid ocean waters to inundate the terrain and form new interior seas. These recently created inland waterways now host displaced kodan Sanctuary populations. Additionally, Jormag provoked substantial tidal surges that overwhelmed and destroyed numerous additional kodan iceburg communities.
The Shatterer, occasionally referred to as the Beast by certain Sentinels, represents a champion designation bestowed by Kralkatorrik. Only one dragon holds this rank at any given moment, with the title transferring to another specimen upon the current holder’s demise. This formidable creature conducts regular patrols across the Dragonbrand region within Blazeridge Steppes. It’s believed to constitute one of the primary mechanisms perpetuating the area’s corruption. Both Sentinel forces and Vigil troops maintain active combat operations against the Shatterer.
The Shatterer encounter demands crystal management during the initial phases while players avoid the devastating shockwaves. The final phase requires coordinated breaking of the boss’s breakbar while managing spawned crystal formations. Failure to properly handle mechanics often results in cascading failures and event collapse.
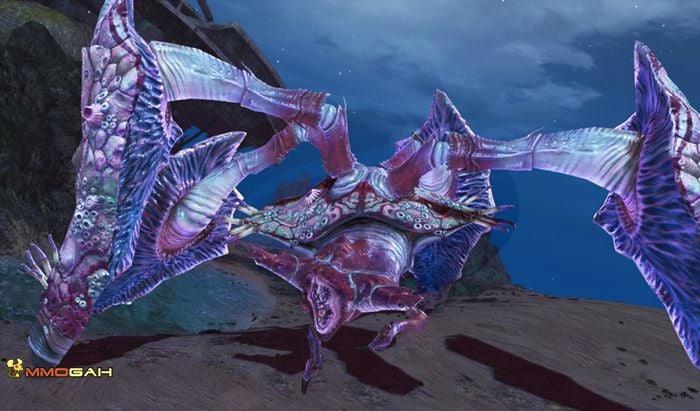
The Shadow Behemoth manifests as an enormous nightmare entity originating from the Underworld, breaching into Tyria through Godslost Swamp in Queensdale, adjacent to the submerged Temple of Ages. During combat engagements, it generates dimensional gateways to the Underworld that call forth shades and aatxes. Eliminating the shadow behemoth represents the ultimate objective within the Secrets in the Swamp meta event chain, with a Demonic Chest materializing following its destruction.
Legendary Karka Queen
The Legendary Karka Queen operates as a world boss within Southsun Cove. When the activation sequence initiates, participants receive a 15-minute window to recapture four settlements (when these locations face karka incursions or deranged fauna) and eliminate the Queen. Once the Lionguard establishes control over all designated points, the Karka Queen materializes.
The Karka Queen possesses exceptionally elevated damage mitigation attributable to the Armored effect. Players must eliminate these stacks by hurling Karka Eggs that spawn periodically throughout the combat area toward her, enabling her elimination before the event duration expires. She periodically regenerates 15 stacks of this defensive buff.
Advanced Karka Queen strategies involve designated egg teams that focus exclusively on gathering and throwing eggs while damage dealers maintain pressure during vulnerability windows. The tight time constraint demands efficient pathing between settlement capture points and the boss arena. Players should prioritize clearing settlements quickly while maintaining awareness of the egg spawn locations for optimal stack removal.

Mastering world boss encounters requires understanding several advanced combat mechanics that significantly impact success rates. Breakbars represent one of the most critical systems, requiring coordinated crowd control to create damage opportunities. Understanding each boss’s specific breakbar mechanics and the most effective CC skills for your profession can dramatically improve group performance.
Phase transitions often introduce new mechanics or environmental hazards that demand rapid adaptation. Successful groups typically assign specific roles including primary healers, condition damage specialists, power damage dealers, and support buffers. Communication through squad commands or voice chat substantially enhances coordination during complex phase changes.
Common mistakes include insufficient crowd control coordination, failure to position properly for mechanics, and inadequate preparation for phase transitions. Advanced players should study boss attack patterns to anticipate mechanics rather than react to them.
Optimization strategies involve proper gear selection with appropriate stat combinations for your role. Condition damage builds typically excel on longer fights with multiple phases, while power builds may perform better during burn phases with limited vulnerability windows.
Timing estimates for world boss events vary significantly based on group coordination and composition. Well-organized squads can complete most encounters within 10-15 minutes, while inexperienced groups may require 20-30 minutes or face failure. We recommend arriving 5-10 minutes before scheduled spawn times to secure optimal positioning and join organized groups.
Effective world boss farming demands understanding event schedules and proper preparation. Most world bosses follow predictable timers with spawn windows occurring every 2-3 hours. Utilizing third-party timer websites or in-game commander tags can help track upcoming events efficiently.
Gear requirements vary by encounter but generally recommend at least exotic-quality equipment with appropriate stat distributions for your role. Support builds should prioritize healing power and boon duration, while damage dealers focus on their primary damage stat and critical chance.
Group composition ideally includes balanced representation of professions with diverse capabilities. Essential roles include stability providers for crowd control mitigation, condition cleansers for debuff removal, and resurrection specialists for recovery from mistakes.
For comprehensive gaming strategies beyond world bosses, consult our Complete Guide to Battlefield 6 for advanced tactical insights applicable across multiple game genres.
Action Checklist
- Study boss mechanics and phase transitions using online guides or training videos
- Gear check: Ensure exotic-quality equipment with appropriate stat combinations
- Join organized squads via Looking For Group tool 10 minutes before spawn
- Coordinate role assignments with squad members for optimal performance
- Practice crowd control skill rotations on training dummies
- Review daily reward timers to maximize loot acquisition efficiency
No reproduction without permission:OnLineGames Guides » World Bosses in Guild Wars 2 Master Guild Wars 2 World Bosses: Essential Strategies, Loot Rewards, and Combat Mechanics Guide