TL;DR
- Eight unique DLC shields offer specialized defense and offensive capabilities for different playstyles
- Acquisition methods vary from enemy drops to merchant purchases and quest rewards
- Strategic shield selection can dramatically improve combat effectiveness against specific enemy types
- Advanced players should prioritize shields that complement their build’s stat investments
- Location-specific navigation strategies save significant time when hunting rare shield drops
The Shadow of the Tree expansion for Elden Ring introduces revolutionary shield mechanics that transform defensive gameplay into strategic offense. Unlike base game shields, these DLC additions feature unique weapon skills and passive effects that can fundamentally alter combat encounters. Understanding each shield’s specialized role helps Tarnished warriors build more effective loadouts for the challenges ahead in the Lands Between.

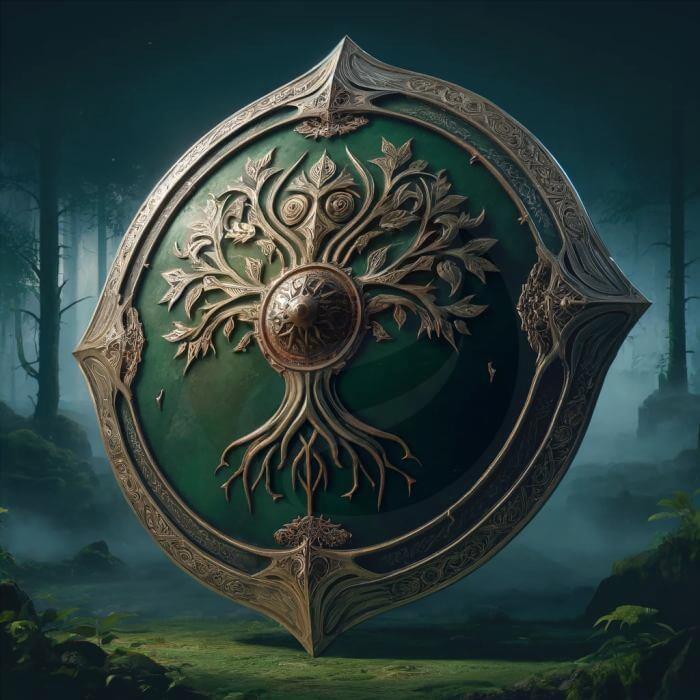
1. Erdtree Greatshield
This magnificent golden circular shield demands substantial faith investment to wield effectively, typically requiring 30-40 Faith depending on your character level. Its signature ability Golden Retaliation creates a protective barrier that not only nullifies incoming sorceries and incantations but also converts that magical energy into a powerful counterattack projectile. This makes it exceptionally valuable against magic-wielding bosses and invaders who rely heavily on spellcasting.
For acquisition, focus exploration on areas dominated by Golden Order adherents and faith-aligned enemies. The shield frequently drops from Tree Sentinels patrolling near minor Erdtrees or can be found in chests within catacombs dedicated to the Erdtree faith. Pro tip: Equip the Silver Scarab talisman to significantly improve your drop rate chances when farming specific enemies.
2. One-Eyed Shield
Carved from solid stone to resemble a cyclops’s visage, this imposing shield unleashes a devastating cannon blast of fire damage when using its skill. While its substantial weight demands high endurance investment, the offensive payoff justifies the stat allocation for strength-focused builds. The cannon fire deals area-of-effect damage, making it particularly effective against grouped enemies and large targets.
To obtain this formidable shield, you must defeat specific cyclops-type enemies found primarily in volcanic regions and mountain caverns. These formidable foes typically guard valuable loot in areas like Mt. Gelmir and the Fire Giant’s domain. Common mistake: Attempting to use this shield without meeting the 34 Strength requirement will leave you vulnerable to guard breaks and counter attacks.
3. Visage Shield
Featuring the terrifying visage of a fire-breathing beast, this shield transforms into a short-range flamethrower when activated. The continuous stream of fire damage excels at area denial and punishing aggressive melee opponents who attempt to close distance. Its flame duration lasts approximately 4-6 seconds, creating sustained pressure in confined spaces.
The flamethrower functionality strongly suggests locations near fire-aligned territories and volcanic activity. Search thoroughly around smithing grounds, fire monk encampments, and areas with abundant lava flows. Advanced tactic: Combine with fire damage-boosting talismans like the Fire Scorpion Charm to increase the flamethrower’s damage output by approximately 15%.
4. Haligtree Crest Greatshield
This expansive kite shield showcases an elegant golden and white design representing the Haligtree’s purity. While it lacks innate special abilities, its true strength lies in complete Ashes of War compatibility, allowing players to customize its skill to match their specific combat approach. The shield’s balanced stats make it an excellent foundation for various defensive strategies.
Acquisition typically occurs through merchant inventory rotations or as quest completion rewards tied to Haligtree lore. Check nomadic merchants in consecrated snowfields and Miquella’s followers for potential availability. Optimization tip: Pair with Barricade Shield ash for temporary maximum guard boost during difficult boss encounters.
5. Fingerprint Stone Shield
Renowned for possessing the highest guard boost stat in Elden Ring, this massive stone slab simultaneously inflicts madness buildup on attackers while featuring a shield bash capability. The substantial 48 Strength requirement makes it exclusive to dedicated strength builds, but the defensive returns are unparalleled for tank-focused playstyles.
Given its unique madness-inducing properties, exploration should concentrate on areas associated with the Frenzied Flame and locations where madness-afflicted enemies congregate.
Advanced strategy: Combine with the Greatshield Talisman to achieve near-perfect blocking efficiency, allowing you to withstand even the most powerful enemy attacks without significant stamina drain. Time estimate: Farming this shield typically requires 2-3 hours of dedicated enemy engagement in madness zones.
6. Great Turtle Shell
This uniquely designed shield provides a solid guard boost of 60 alongside the Barricade Shield skill that temporarily enhances blocking capabilities. The skill activation provides approximately 8 seconds of significantly improved stability, perfect for surviving enemy combos and boss super attacks.
Location intelligence confirms this shield rests atop a specifically identified tower in the Weeping Peninsula region. Navigation requires careful platforming and potentially dealing with aerial threats while ascending.
Practical tip: The Barricade Shield skill consumes minimal FP compared to similar defensive abilities, making it economical for extended exploration sessions. Common mistake: Attempting the tower climb without adequate healing items often results in unnecessary deaths and progress loss.
7. Inverted Hawk Heater Shield
Featuring a guard boost rating of 62 complemented by a reliable parry skill, this red and black heater shield offers excellent mid-game defensive options. The parry timing window is moderately forgiving compared to smaller shields, making it ideal for players learning deflection mechanics.
This distinctive shield can be purchased directly from a nomadic merchant operating in the Siofra River region. Ensure you have accumulated sufficient Elden Ring runes for the transaction, typically ranging from 3,000-5,000 runes depending on merchant stock fluctuations.
Economic planning: Farm runes from nearby enemies or complete minor dungeons to gather the necessary currency without depleting your character progression resources.
8. Blue-Gold Kite Shield
This beautifully crafted shield depicts the Erdtree against a celestial blue background while delivering an impressive guard boost of 65 alongside parry capability. The visual design reflects the harmony between earthly and celestial forces within the game’s lore.
Similar to the Inverted Hawk variant, this shield is available through nomadic merchant networks, specifically those operating within the Weeping Peninsula territory.
For time-constrained players, reputable third-party marketplaces like MMOGAH offer alternative acquisition methods, though this bypasses the intended exploration and combat challenges.
Each shield in the DLC arsenal provides distinctive defensive and utility combinations that can dramatically influence combat outcomes. Whether reinforcing your protective capabilities, augmenting offensive potential, or simply enhancing character aesthetics, these shields represent worthwhile pursuit objectives. The optimal shield choice frequently determines battle success, delivering not just damage mitigation but crucial tactical superiority against the diverse threats throughout the Lands Between.
Strategic insight: Match shield selection to your primary damage stats – faith builds benefit from Erdtree Greatshield, while strength specialists excel with Fingerprint Stone Shield. Select thoughtfully, Tarnished adventurers, and may your defensive implement prove as resilient as your determination.
Advanced player recommendation: Master 2-3 complementary shields for different encounter types rather than relying on a single option for all situations.
Action Checklist
- Identify your character’s primary stat focus (Strength, Faith, etc.) to determine compatible shields
- Farm specific enemy types in designated regions for shield drops with Silver Scarab equipped
- Accumulate sufficient runes for merchant-purchased shields through dungeon completion
- Test shield skills against minor enemies before committing to boss encounters
- Optimize shield selection based on upcoming boss mechanics and area enemy types
- Combine shields with complementary talismans and ashes of war for maximum effectiveness
No reproduction without permission:OnLineGames Guides » Elden Ring DLC Guide: Top 8 Best Shields and How to Obtain Them Master Elden Ring's top 8 DLC shields with expert acquisition strategies and combat optimization tips