TL;DR
- Ranni’s quest spans multiple regions and requires defeating major bosses like Radahn and Astel
- Key items include Fingerslayer Blade, Dark Moon Ring, and Discarded Palace Key
- The quest unlocks one of Elden Ring’s most complex and rewarding endings
- Proper preparation with upgraded weapons and status resistance is essential
- Multiple underground areas and secret locations must be explored to completion
Elden Ring presents players with numerous NPC questlines, but Ranni the Witch’s narrative arc stands apart in both scope and complexity. This comprehensive journey spans nearly every region, reveals deep lore connections, and ultimately unlocks one of the game’s most sought-after endings. This guide provides detailed navigation through every phase of this elaborate side quest. Be prepared for significant challenges that may require strategic equipment upgrades and consumable management.
Your initial interaction with Ranni occurs almost immediately after starting your adventure. She appears at the Church of Elleh in Limgrave during the early evening hours, offering the essential Spirit Calling Bell for summoning spirit ashes. Despite her claim that this would be your final meeting, you’ll encounter her again under different circumstances.
Your next encounter transpires in Liurnia of the Lakes, accessible either by conquering Stormveil Castle’s Godrick or utilizing the hidden eastern passage around the fortress. Navigate northward along the western shoreline until you reach Caria Manor, where you must overcome Royal Knight Loretta. Beyond lies the Three Sisters region, featuring three distinct towers. Approach the central structure known as Ranni’s Rise, where she’ll extend an invitation to join her service. Accepting initiates the quest’s primary phase and introduces her three key associates: Preceptor Seluvis, the warrior Blaidd, and War Counselor Iji. This conversation sets your course toward Nokron’s mysterious underground metropolis.
To advance Ranni’s objectives, you must systematically consult each of her trusted allies for critical intelligence regarding Nokron’s location. Begin at Seluvis’s Rise, the leftmost tower adjacent to Ranni’s location. Following your discussion with Seluvis, proceed to the Road to the Manor Grace location near Caria Manor to converse with War Counselor Iji.
Your investigation leads underground to the Siofra River, accessible via a concealed elevator in Mistwood, Limgrave. Locate Blaidd positioned east of the Grace point, concealed behind massive stone pillars. Engage in dialogue until he directs you back to Seluvis. Return to Seluvis’s Rise and select the Nokron inquiry option. He’ll reference Sorceress Sellen, who possesses additional knowledge about the Eternal City. Find her within Limgrave’s Waypoint Ruins, where she explains the celestial connection between Ranni’s destiny and stellar constellations. This revelation necessitates confronting General Radahn in what many players consider the quest’s most demanding segment. Ensure your armaments are fully enhanced and consider acquiring supplementary resources before this engagement.

A common mistake involves underestimating Radahn’s aggression and area-of-effect attacks. For optimal performance, utilize torrent for mobility and focus on striking from behind during his recovery animations.
Following Radahn’s defeat, a celestial impact event creates a massive chasm in southern Limgrave. Descend into this newly formed crater to access Nokron, the Eternal City. Proceed continuously until reaching the initial Site of Grace within the metropolis. From this checkpoint, advance forward through the distant gateway into the courtyard area. Traverse the bridge beyond and pass through the distinctive yellow mist barrier.

Within this chamber awaits one of Elden Ring’s most distinctive encounters—the Mimic Tear boss. This adversary replicates your character’s appearance, equipment, and abilities, creating a mirror match scenario. Upon victory, exit the combat arena and cross the subsequent bridge.
Before the bridge concludes, divert left into the forested section. Locate the Grace positioned along the cliff edge. Maintain leftward progression through this woodland while evading enemy clusters that can quickly encircle unprepared adventurers. Upon reaching the area’s initial tier, carefully descend from the Grace point onto the rooftop structure ahead. Exercise extreme caution as this zone contains numerous powerful adversaries and mimic variants. Strategic avoidance proves more efficient than direct confrontation with every foe. At the sector’s terminus, a substantial archway leads to a chamber containing a chest. Opening this repository yields the Fingerslayer Blade, the artifact Ranni specifically requested.
Return to Ranni’s Rise in Liurnia and present the Fingerslayer Blade. After multiple conversational exchanges, she bestows the Carian Inverted Statue. For additional strategic insights, consult our Complete Guide for additional combat techniques.
The Carian Study Hall occupies a central position along Liurnia’s eastern perimeter. Previous visits may have involved battling Preceptor Miriam and collecting various items. This time, approach the pedestal situated before the celestial globe in the main chamber.
Access previously unexplored sections by returning to the elevator shaft behind the globe. This transports you to the lower level of previously accessible areas. After re-engaging Miriam, descend to the ceiling level and locate a portal opening to the Liurnia Tower Bridge Grace. Proceeding eastward along the bridge confronts you with a Godskin Noble adversary. Beyond the Divine Tower of Liurnia, utilize the elevator to reach the subsequent Grace location.
At the tower’s apex, discover both the Cursemark of Death and Stargazer Heirloom on a deceased explorer. This discovery initiates the questline’s concluding segment. Return to Ranni’s Rise but now approach the rightmost tower. Renna’s Rise, previously inaccessible, now permits entry. Ascend the ladder to the summit doorway, where a functional Waygate teleports you to Ainsel River Main.
Near the exit point lies a remains holding the Miniature Ranni doll. Retrieve this item and follow the path to the Ainsel River Main Grace. Here, repeatedly engage the doll in conversation until it instructs you to eliminate the Baleful Shadow located deeper within this region.
Continue navigating the rivercourse until reaching the western map sector, where you’ll find the Nokstella Water Basin Grace. Proceed to the secondary elevator that descends further underground. A proximate tunnel leads to the Baleful Shadow encounter, which materializes near a waterside coffin. This opponent presents moderate difficulty with conspicuous attack patterns and limited healing capacity during combat. Melee specialists should employ dodging maneuvers to access rear positions for critical backstab opportunities. Maintain distance to provoke offensive actions that create counterattack openings. Defeating this entity rewards you with the Discarded Palace Key.
This key unlocks a specific chest within Raya Lucaria Academy’s Grand Library. If this dungeon remains unconquered, journey to central Liurnia and defeat Rennala, Queen of the Full Moon. Subsequently, access the Grand Library and utilize the key on the chest positioned behind Rennala. This yields the Dark Moon Ring, the subsequent crucial quest item.
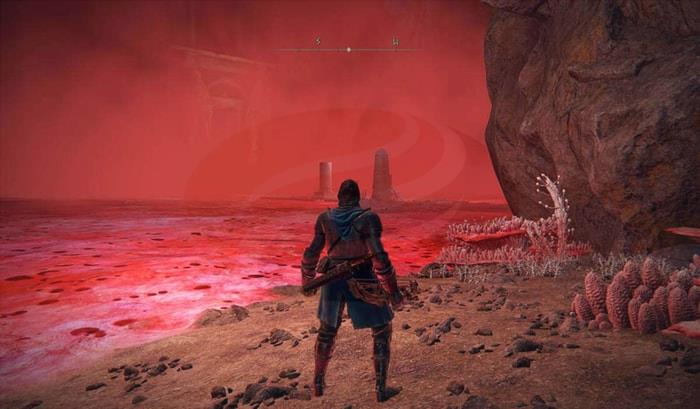
The subsequent phase presents significant environmental hazards. Return to the underground Ainsel River location where you previously battled Baleful Shadow. Advance beyond the combat arena to an elevator descending to the Lake of Rot shoreline. This expansive crimson body of water inflicts Scarlet Rot status upon contact. Multiple traversal methods exist, though accepting gradual damage while maintaining healing item consumption often proves most efficient. Reach the opposite shore to discover the subsequent Grace point.
Beyond lies the Grand Cloister, containing an optional Ulcerated Tree Spirit that drops a Golden Seed upon defeat. Your subsequent objective involves the coffin positioned atop the Rot waterfall.
Surprisingly, you must enter this coffin to repose before progressing to the subsequent challenging boss encounter. For specialized combat preparation, review our Weapons Unlock guide for optimal equipment selection.
Astel presents complex combat mechanics but responds effectively to proper tactical approaches. Focus offensive actions on its cranial region for maximum damage potential. This entity employs diverse physical assaults, area-effect abilities, and projectile attacks, with prime counterattack opportunities following its orbital assault. Maintain aggressive positioning while staying proximate, as numerous attacks will fail to connect at close range. Remain vigilant for pattern modifications and teleportation maneuvers that may include damaging transitions. Typically, Astel relocates without immediate aggression, though occasionally it materializes overhead for grabbing maneuvers. If visual tracking fails, prepare immediate evasion as subsequent actions may prove fatal.
The binding fang strike represents another significant threat, capable of capturing and potentially eliminating you instantly. Disengage immediately upon observing luminescent fang indications. At approximately half health capacity, a meteor shower sequence initiates, requiring continuous dodging as your primary survival mechanism.

Upon defeating Astel, receive the Remembrance of the Naturalborn and 80,000 runes. The Deep Ainsel Well lift becomes operational, transporting you to the Moonlight Altar region.
You now access the elevated southern Liurnia sector above Albinaurics Village, exclusively reachable through this questline. The Cathedral of Manus Celes resides in the northern portion of this territory. The Grace location adjoins a cavern requiring careful navigation. Proceed through the adjacent dark passageway.
Continue advancement until encountering Ranni’s inanimate form alongside several severed digits. Now apply the Dark Moon Ring to Ranni’s finger.
Following this action, engage her in conversation once more. She now formally acknowledges you as her consort and announces her impending journey into the celestial expanse. This concludes the extensive and demanding narrative journey, making Ranni’s ending available. As compensation, acquire the Dark Moon Greatsword, delivering frost and lunar damage effects. This represents an exceptional armament for greatsword specialists. For character build optimization, consult our Class Guide for specialized build recommendations.
Upon quest completion, you gain access to Ranni’s distinctive conclusion sequence. Remember this represents an optional narrative path rather than mandatory progression. After overcoming the final boss, simply interact with the azure summon sigil on the ground.
She dismantles the Golden Order, establishing her own paradigm while terminating the Greater Will’s dominion over the Lands Between.
Subsequently, Ranni embarks on a millennial expedition accompanied by the Tarnished and her newly formed Order. For the first time, the Lands Between exists without sovereign authority due to her departure. This comprehensive walkthrough provides all necessary information to successfully navigate Ranni’s elaborate questline and experience her unique ending conclusion.
Action Checklist
- Meet Ranni at Church of Elleh for Spirit Calling Bell
- Navigate to Liurnia, conquer Caria Manor, and accept Ranni’s service at her rise
- Consult Seluvis, Iji, and Blaidd for Nokron intelligence
- Defeat General Radahn at Redmane Castle
- Explore Nokron, defeat Mimic Tear, and retrieve Fingerslayer Blade
- Complete Carian Study Hall inversion and acquire Dark Moon Ring
- Navigate Ainsel River, defeat Baleful Shadow, and progress through Lake of Rot
- Conquer Astel, access Moonlight Altar, and activate Ranni’s ending
No reproduction without permission:OnLineGames Guides » How to Complete Ranni Quest in Elden Ring Complete step-by-step guide to completing Ranni's questline and unlocking the Age of Stars ending