TL;DR
- Static Strike triggers Shockwave support with perfect cooldown synchronization every 0.6 seconds
- Strength stacking with Replica Alberon’s Warpath converts to chaos damage through Iron Will and Battlemage’s Cry
- Defense combines 6.5K+ life, 75% block, overleech, and rage generation via Kaom’s Spirit
- Frozen Legion provides burst damage for bosses without attack speed scaling requirements
- Build excels in high-investment scenarios with smooth autobomber-style gameplay
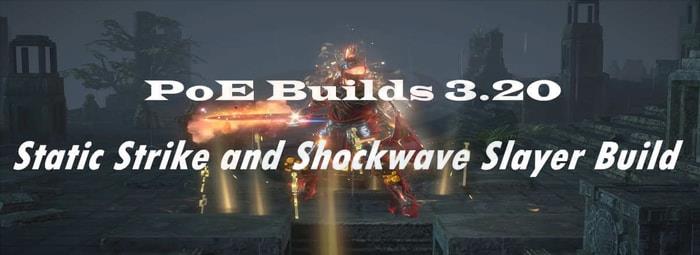
Greetings exiles, I’m excited to break down Palsteron’s innovative Static Strike and Shockwave Slayer combination that redefines melee automation.
Build Mechanics and Core Synergies
To grasp this build’s revolutionary approach, we must examine the intricate dance between Static Strike and Shockwave Support. Static Strike functions as a lightning-based melee attack that, upon striking an enemy, generates persistent lightning beams targeting nearby monsters. Palsteron’s genius lies in using Static Strike primarily as an activation mechanism for Shockwave Support rather than relying on its direct damage output.
Shockwave Support, when linked to Static Strike, creates those massive circular shockwaves you see obliterating entire screens. The visual spectacle often enhanced by cosmetic effects represents the build’s core damage delivery system.
The build’s fundamental advantage stems from complete independence from attack speed investments. Shockwave operates on a fixed 0.6-second cooldown that cannot be accelerated through conventional means. Palsteron discovered that by carefully managing Static Strike’s beam emission rate, perfect synchronization with Shockwave’s cooldown becomes achievable.
This synchronization creates consistent Shockwave activations every 0.6 seconds throughout Static Strike’s duration. Combined with Shockwave’s five-charge storage capacity, this allows players to strike once with Static Strike then freely navigate while Shockwave automatically clears surrounding enemies.
Advanced players should note that achieving this synchronization requires avoiding attack speed modifiers that would cause Static Strike to outpace Shockwave’s cooldown. The attack speed independence liberates passive points and gear affixes for pure damage scaling, creating an exceptionally efficient damage-per-investment ratio.
Offensive Scaling and Damage Optimization
Let’s examine the damage scaling methodology – The primary strategy revolves around Strength stacking, a well-established archetype that this build executes with remarkable efficiency. Our objective involves maximizing Strength acquisition through passive tree optimization and strategic gear selection, then leveraging synergistic items to amplify our accumulated might.
Replica Alberon’s Warpath stands as the cornerstone item, providing flat chaos damage scaling directly with our Strength total. While this represents a significant currency investment, the damage return justifies the cost for serious players. The substantial flat damage proves particularly valuable for skills like Shockwave and Static Strike that don’t benefit from attack speed multipliers.
However, careful builders will notice the boots contain a critical modifier preventing any damage types except chaos. This creates a conversion challenge where our Strength stacking’s inherent physical damage bonus becomes inaccessible without proper mitigation.
The solution requires two key components: Iron Will, which transfers our Strength’s physical damage bonus to spell damage, and Battlemage’s Cry, which applies our spell damage to attacks. This elegant solution completes the conversion cycle, restoring our Strength investment’s full damage potential.
A significant offensive advantage emerges from a specific modifier on our mace. Palsteron utilizes this attribute to scale Area of Effect based on Strength, providing a global Area increase that explains the build’s massive Shockwave coverage and extensive Static Strike range.
Additionally, Palsteron incorporates the new Frozen Legion skill for devastating boss damage bursts. Since Frozen Legion operates on cooldowns similar to our primary skills, we avoid attack speed scaling concerns entirely. We can even apply Pulverise Support to both Frozen Legion and our main skills, gaining an overwhelming 70% more damage multiplier without suffering the typical attack speed penalties.
Common mistake: Attempting to scale attack speed ruins the delicate synchronization between Static Strike and Shockwave. Optimal play involves single attacks followed by strategic positioning rather than rapid successive strikes.
Defensive Layers and Survivability
What occurs when enemies successfully land attacks? Palsteron engineered multiple overlapping defensive mechanisms. Fortunately, our Strength stacking foundation provides a substantial life pool, typically exceeding 6,500 health points depending on gear configuration.
We achieve maximum Block chance at 75% through shield selection and The Iron Fortress, another Strength-focused defensive item. As Slayer specialists, we leverage overleech mechanics through specific passive allocations that grant enhanced life leech capabilities persisting even at full health.
This sustained leech becomes crucial because we intentionally eliminate life regeneration, a strategic choice with deliberate purpose.
Kaom’s Spirit gloves serve as the transformation mechanism, converting our life regeneration into rage generation instead. Our substantial life pool and converted regeneration enable extended Berserk uptime, a powerful buff consuming rage for both damage reduction and damage amplification.
Our defensive arsenal further includes 30,000-40,000 armor rating with Molten Shell guard skill, plus Unwavering Stance for complete stun immunity.
Pro tip: Activate Molten Shell immediately before engaging dangerous enemy packs or boss mechanics for maximum damage absorption.
Advanced Tips and Common Pitfalls
This build demonstrates exceptional survivability throughout endgame content. Palsteron confirms it successfully carried him through intensified metamorph encounters and essence mobs all the way to level 99.
Palsteron crafted a high-investment, high-performance build offering exceptionally smooth gameplay. We rarely encounter autobomber-style characters that avoid herald dependencies or triggered spell mechanics, particularly unusual when implemented as a melee specialization.
Optimization strategy: Prioritize Strength on every possible gear piece while maintaining necessary resistances. The damage scaling from Strength provides exponential returns through multiple conversion layers.
Critical path progression: Focus on acquiring Replica Alberon’s Warpath first, then build around the chaos damage restriction with proper conversion support.
Boss fighting technique: Use Frozen Legion during damage phases while maintaining Shockwave area control. Time Berserk activation for maximum damage reduction during critical mechanics.
Time investment: Expect 10-15 hours to reach mapping viability, with another 20-30 hours for full optimization.
Action Checklist
- Acquire Replica Alberon’s Warpath and plan chaos damage conversion
- Set up Iron Will and Battlemage’s Cry for damage conversion
- Configure Static Strike with Shockwave Support and synchronize cooldowns
- Implement defensive layers: 75% block, overleech, Kaom’s Spirit rage generation
- Practice single-attack positioning and Shockwave automation
- Integrate Frozen Legion for boss damage phases
No reproduction without permission:OnLineGames Guides » PoE Builds 3.20: Static Strike and Shockwave Slayer Build Master Palsteron's Static Strike and Shockwave Slayer build with comprehensive mechanics and optimization strategies