TL;DR
- Sunder Charms break monster immunities by reducing them to 95% resistance
- Six elemental types target specific immunities with strategic trade-offs
- Terror Zones provide optimal farming for both charms and crafting materials
- High item level crafting dramatically improves affix probabilities
- Strategic charm use enables previously impossible character builds
Diablo 2 Resurrected’s revitalization of the classic ARPG introduces transformative mechanics, with Sunder Charms representing one of the most significant gameplay innovations. These specialized D2R items fundamentally alter combat dynamics by shattering monster immunities, transforming previously untouchable enemies into viable targets. The parallel introduction of terror zones has revolutionized high-level amulet crafting accessibility, enabling players to systematically create gear that can outperform even legendary unique items through strategic affix optimization.
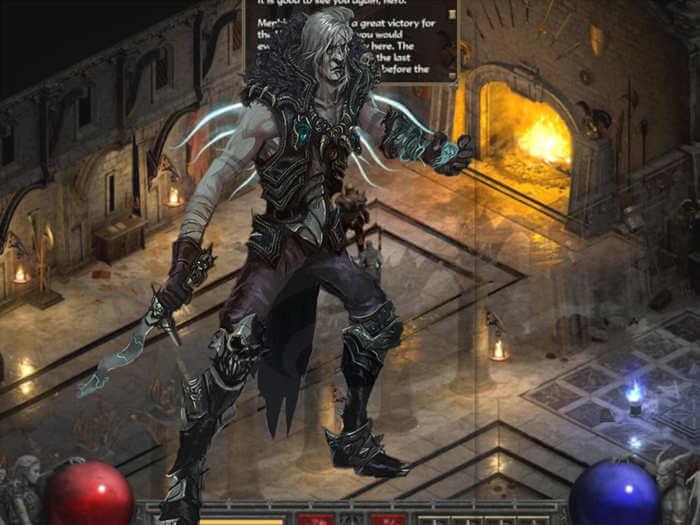
What Are Sunder Charms
Sunder Charms comprise a collection of six distinct magical items, each engineered to neutralize a particular elemental immunity type. When equipped, these charms transform a monster’s complete immunity into a manageable 95% resistance threshold, effectively creating damage opportunities where none previously existed. This immunity reduction mechanic has profoundly influenced build diversity and strategic gameplay, enabling character configurations that were previously considered impractical due to immunity limitations.
The Immunity Breaking Mechanics
Sunder Charms operate through a sophisticated game mechanic that doesn’t eliminate immunities entirely but reduces them to a level where damage penetration becomes feasible. The key insight is that while monsters retain significant resistance, the right combination of gear and skills can overcome even this reduced threshold.
The Six Faces of Sunder
Each charm targets a different elemental immunity:
• Black Cleft: Sunder Magic Immunity
• Bone Break: Sunder Physical Immunity
• Cold Rupture: Sunder Cold Immunity
• Crack of the Heavens: Sunder Lightning Immunity
• Flame Rift: Sunder Fire Immunity
• Rotting Fissure: Sunder Poison Immunity
These specialized items introduce strategic depth through their dual-effect nature: while they break enemy immunities, they simultaneously reduce your character’s resistance to the corresponding element. This creates meaningful gear choices where players must balance offensive capability with defensive considerations.
Strategic Trade-offs and Countermeasures
The resistance penalty imposed by Sunder Charms necessitates careful gear planning. Successful players mitigate this drawback through strategic equipment choices, such as incorporating items with substantial resistance bonuses or leveraging skills that provide elemental protection. The most common mistake is underestimating the defensive impact, which can leave characters vulnerable in high-difficulty content.
Acquiring Sunder Charms
Sunder Charms exclusively drop from Champion, Unique, Super-Unique, and Boss monsters encountered within Terror Zones. The dynamic rotation of these zones encourages systematic exploration and conquest to obtain these coveted D2R items.
Terror Zone Farming Strategies
Optimal farming requires understanding Terror Zone mechanics and monster density. Focus on zones with high monster concentration and efficient clearing potential. For optimal results, prioritize areas where your character’s primary damage type aligns with common monster immunities to maximize the value of acquired charms.
• Sunder charms enable breaking resistances and bypassing immunities, dramatically expanding viable build options. The introduction of these items has revolutionized Diablo 2’s meta by enabling previously impossible character configurations.
• They have significantly increased the strategic value of negative resistance equipment, creating new gear optimization opportunities. Sunder charms have transformed gameplay dynamics by allowing strategic immunity breaking and effective utilization of specialized equipment.
• Sunder charms have diversified farming patterns by enabling characters to efficiently clear previously inaccessible zones.
• These items have become premium trading commodities, particularly during early ladder seasons when their impact on progression is most pronounced.
• Build diversity has experienced unprecedented growth with sunder charm integration, making numerous character builds competitively viable.
• They have transformed previously challenging character builds, particularly poison or elemental-focused configurations, into highly effective and enjoyable playstyles.
• Thunder charms have reinvigorated the Diablo 2 experience by introducing novel strategic possibilities. The overall impact of sunder charms has been transformative, offering players expanded creative freedom and exploration opportunities.
Advanced Acquisition Techniques
Seasoned players employ several optimization strategies: targeting specific Terror Zones known for higher drop rates, utilizing magic find gear strategically, and understanding monster type distributions. A common pitfall is farming inefficient zones – research current Terror Zone rotations and prioritize those with favorable monster compositions for your build.
Mastering the Art of Godly Amulet Crafting
Crafting in Diablo 2 Resurrected transcends mere equipment creation – it represents a sophisticated art form capable of producing exceptionally powerful and personalized gear. Amulets specifically offer unparalleled customization potential for enhancing character capabilities across multiple dimensions.
Crafting elite amulets in Diablo 2 Resurrected combines systematic knowledge with calculated risk management. This comprehensive guide provides the framework for creating amulets that can define your character’s power level.
Gather the Ingredients:
• A Magic Amulet with elevated item level (ilvl) – ideally ilvl 90+ for optimal affix availability.
• A specific Rune corresponding to your desired amulet type (Caster, Hit Power, Blood, Safety).
• A Perfect Gem matching the specific crafting recipe requirements.
• Any Jewel, regardless of its inherent properties or quality.
These components undergo transmutation within the Horadric Cube to generate crafted amulets with predetermined properties and potential supplementary affixes.
Understand the Item Level (ilvl):
• The crafted amulet’s ilvl critically influences available affix pools and quality tiers.
• Crafted Items represent exclusive equipment that can only be generated through Horadric Cube recipes. Regarding quality, they rank among the game’s most powerful items. Certain statistics are guaranteed on crafted items, varying by recipe type. Additionally, you receive 1-4 randomized attributes comparable to those found on Rare Items.
Beyond the fixed properties, crafted items acquire 1-4 random affixes determined by ilvl thresholds:
Ilvls 1-30: 4 affixes (20 %), 3 affixes (20 %), 2 affixes (20 %), 1 affix (40 %)
Ilvls 31-50: 4 affixes (20 %), 3 affixes (20 %), 2 affixes (60 %)
Ilvls 51-70: 4 affixes (20 %), 3 affixes (80 %)
Ilvls 71+: 4 affixes (100 %)
The quality of supplementary Statistics consistently depends on two critical factors:
1) The Character Level of your crafting character. Elevated levels correlate with superior D2R enhancement Statistics!
2) The Item Level of the Magic Item being Crafted.
The item level consistently matches the level of the monster that dropped it.
Gambled Items always possess a level within +/- 3 levels of your gambling character’s level.
Clvl denotes your character’s level, while Alvl represents the affix level of the utilized magic amulet.
Use the Horadric Cube:
• Position the Magic Amulet, appropriate Rune, Perfect Gem, and Jewel within the Horadric Cube.
• Activate the Transmute function to generate your newly crafted amulet.
Aim for High-Level Crafting:
• To maximize probabilities for premium affixes like +skills or faster cast rate, ensure your amulet’s ilvl remains elevated.
• Recent game modifications have simplified lower-level crafting compared to previous iterations, though superior levels continue providing enhanced opportunities for elite-tier affixes.
Terror Zones:
• Leverage terror zones for acquiring high-level magic amulets suitable as crafting foundations.
• These zones feature dynamic modifications and present elevated-level monsters capable of dropping superior loot.
RNG Factor:
• Remember that crafting incorporates significant randomness, potentially requiring numerous attempts to achieve genuinely “godly” amulet results.
Repeat the Process:
• Persist with crafting and systematic farming for improved components. Increased crafting frequency enhances your statistical likelihood of generating amulets with desired attributes.
By implementing these methodologies with disciplined patience, you can craft amulets that substantially amplify your character’s combat effectiveness. Best wishes for your crafting pursuits throughout Diablo 2 Resurrected!
Action Checklist
- Identify optimal Terror Zones for your build and farm Champion/Unique packs
- Acquire high ilvl magic amulets (ilvl 90+ recommended)
- Craft amulets at character level 93+ for optimal affix probabilities
- Balance Sunder Charm penalties with resistance gear
- Experiment with previously impossible build combinations
No reproduction without permission:OnLineGames Guides » Unveiling the Power of Sunder Charms and Crafting Godly Amulets in Diablo 2 Resurrected Master Sunder Charms and craft godly amulets to dominate Diablo 2 Resurrected endgame content